Oh - and remove the Camel's hump !
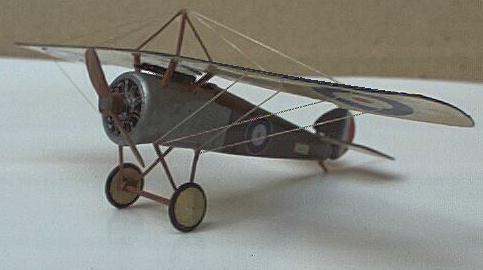
Sopwith Swallow
| Take the fuselage and tail surfaces from a Revell or Airfix kit, discard the wings, fill and sand the lower
fuselage where the lower wings go and add a scratch-built wing to the top to make either the Sopwith 'Swallow' or Harry Hawker's 'runabout.' Oh - and remove the Camel's hump ! |
The wing was made in the following way: 1. Plans from J.MBruce's 'Fighters WW1' were scanned into the computer, resized to give a printout in 1:72 scale. 2. These were traced onto styrene sheet, which was cut to outline and the rib and leading edge riblet positions were marked in pencil and then lightly scribed top and bottom. 3. The wing was then given a slight under camber by gently bending under hot water. | 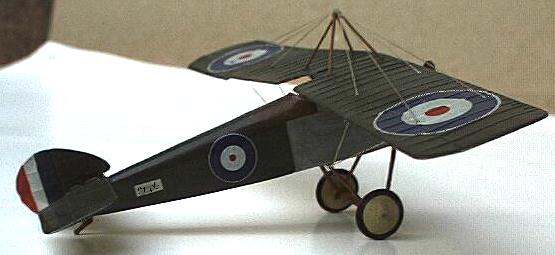 |
4. Masses of heat-stretched sprue were made. Lengths of this were then glued into the scribed lines on the upper wing surface using liquid poly applied with a syringe.
5. When set, the wing was lightly sanded using 1200 grade wet or dry paper (used wet) -IN THE DIRECTION OF THE RIBS! until almost flat.
6. Holts grey primer was applied and lightly sanded. I did this twice so that the wing 'ribs' eventually blended into the 'fabric.'
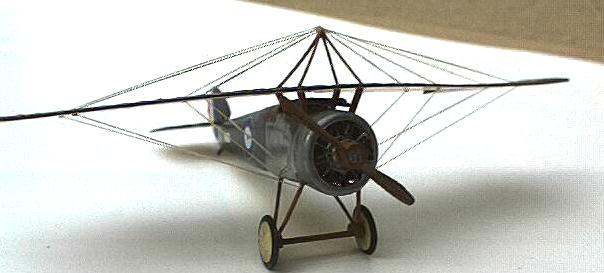 | 7. The wing was drilled for the rigging wires and the cabane struts (made from 'Strutz' material) and finally mounted above the fuselage with only a small gap. 8. Decals were spares from the Toko Sopwith Snipe. |
The wing-making method was also used on all the flying surfaces on the scratch built Taube.
Right-Click on the .GIF file here to save the wing plan if you you'd like to try it. Use Paint shop Pro or similar, or a CAD program to resize the image till it prints out according to the cm scale below the wing. (This is for 1:72 scale.)
![]()