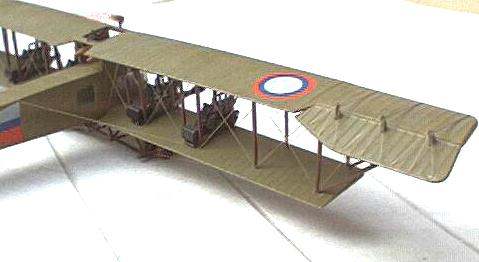
( above - the Maquette 'Ilya Muromets' bomber.)
Rigging WW1 Aircraft
This page is still under construction.
I've tried all sorts of materials to rig the 1:72 scale aircraft I build: Rolled copper wire; fishing line; stretched sprue, but the one material I've found easiest to apply is an elastic lycra thread sold in knitting shops. It's called 'shirring' and apparently it's used by the members of the W.I. to elasticate cuffs and collars on wooly jumpers. I believe Aeroclub sell it as 'Stretch Thread 809' or Stretch Thread 350' - the latter is thinner, but cannot be split into separate filaments.
The real boon of this material is that once fixed in place with tiny drops of cyano (superglue), it stretches if accidentally 'knocked'. Thus avoiding what the flying model fraternity refer to as 'Hanger Rash.' ( The tendency for models to get damaged while 'safely' in storage or being handled. )
It fixes in place with tiny drops of cyano in seconds, allowing very rapid progress with what most of us consider the most tedious part of modelling WW1 airplanes. It will even stick to itself with tiny amounts of glue.
(
above - the Maquette 'Ilya Muromets' bomber.)
Recent correspondence with WW1 Mailing List members questioned the longevity of this material. I replied that I had been using the same reel of lycra thread
for years. The oldest model using the material was a 1:24 scale Sopwith Triplane built in 1994. The threads are all still intact, despite numerous house moves and changes in storage conditions.
I usually start with those wires which emerge from the fuselage:
1. Use a small drill bit to produce a 'dimple' in the fuselage where the wire emerges.
2. With a piece of thin stretched sprue, or thin copper wire with a small loop twisted into the end, apply a tiny drop of cyano into the dimple.
3. Place the end of a piece of lycra thread into the glued dimple using tweezers - it's sometimes possible to push the thread more firmly into place with a pin ( easier if the pin is a bit greasy - rub it between your fingers first-.)
4. Wait a few seconds and then pull very gently. - This seems to help the setting process, perhaps the cyano flows by capillary action along the thread and sets quicker as it is exposed to more air. If the thread pulls off, it's best to let the glue set and then clean up the hole afterwards. Applying more cyano makes a mess and the thread tends not to stick so well. (Perverse, I know.)
5. When the glue has definitelyset, make a small nick at the top of the first strut, using a sharp blade and stretch the thread over the groove. Of course, this is easiest using tweezers in both hands.
6. Now apply a drop of superglue to the nick, (presumably with your third hand !), wait a few seconds and gradually release the tension on the thread. It should stay in place.
7. Repeat the process at the next strut.
I try to work out beforehand the longest 'runs' possible and avoid finishing a run at a point where I really do need three hands. Spots of paint (in the colour of the strut) cover the nicks adequately, and it's even possible to paint (dye ?) the thread using thinned acrylic paint to darken it if necessary.
As I mentioned above, some types of thread can be split along their length to make thinner threads.
![]()