| My Kiosk Story So Far. | ||
|
|
||
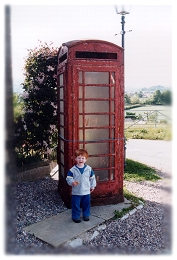 |
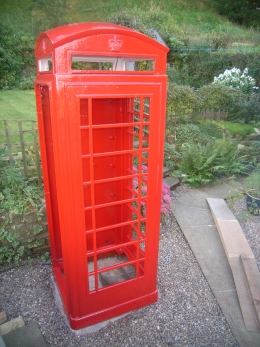
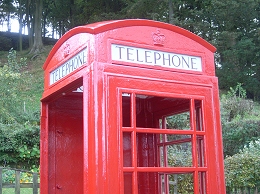
This is the K6 as
originally delivered. I had carefully arranged with the
seller that it would be delivered "two weeks on Saturday", as
we were away the following weekend. I also needed time to
move a load of junk around in the yard and to put in a
suitable concrete base for the box to sit on. |
|
|
The following Saturday,
("sorry mate we'll be up late morning to shift it") the
lorry appeared at 7:30 a.m. This is not my idea of late
morning and consequently my plans of photographing the
operation were forgotten as I hurried to get dressed before
they decided to leave again! Anyway, the HIAB on the front
of the truck made light work of swinging the kiosk into its
final (as I thought at the time) resting place. |
 |
|
 |
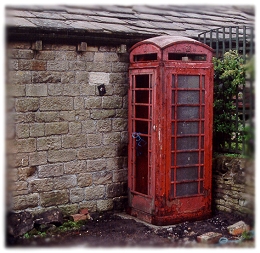
I've acquired all the
new glass it will need along with original cast iron bead frames which are very difficult to find these days. Other scarcites are the Venner time switch to control the interior lamp and the brass lamp holder itself. |
|
|
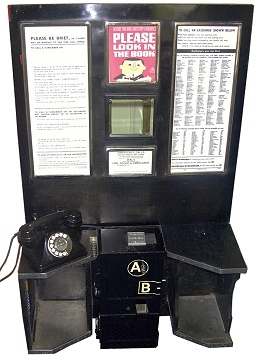
This is the "jubilee
interior" equipment. Everything is original apart from
the notices. Some of the notices need changing for items
more suitable to the 1956 date which I have chosen for
this kiosk to represent. |
 |
|
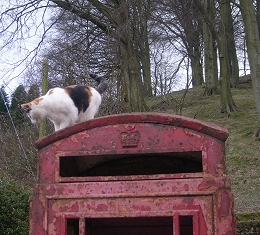 |
Not a cat on a hot tin roof, more a cat on a soanian dome... "Now why did I come up here and more importantly, how the heck am I going to get back down?" |
|
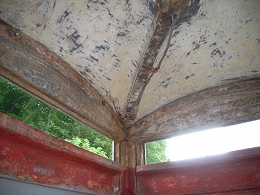
After 6 years of collecting parts, 2008 sees the kiosk move 5 metres and the start of the restoration: After wire brushing and sanding the whole kiosk, this is the inside of the dome ready for priming. |
 |
|
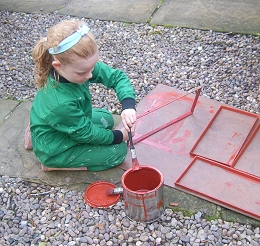 |
No, it's definitely not child labour - it's Girl Power! |
|
The whole thing has been filled and primed. It is now ready for painting in Post Office Red. Jobs still to do:
|
 |
|
 |
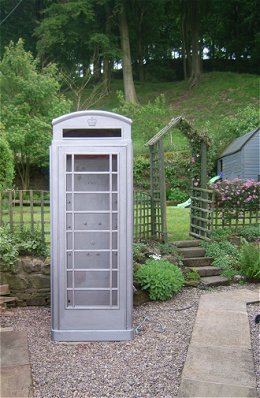
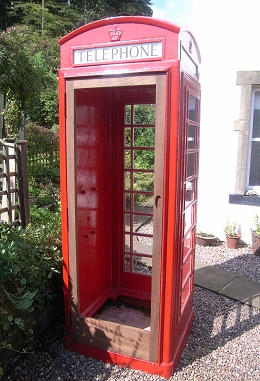
In total the kiosk has had two coats of high-build grey primer, two coats of red oxide primer and one coat of red enamel (with at least one more top coat to go). At least it is finally red - to be precise BSS 381C 538 Post Office Red, (now known for some reason as BSS 381C 538 Cherry Red). This is the original pre 1968 darker red. From 1969 a brighter shade, BSS 381C 539 Postal Service Red was (and still is) used. |
|
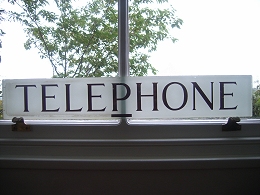
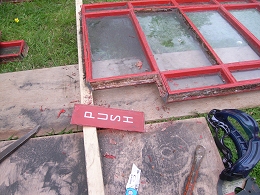
The old "Telephone" signs needed cleaning. I used a Stanley knife blade to scrape off the remains of the ancient paint and putty and a nylon pan scrubber to get them as clean as possible. I was left with ingrained dirt on the outside surface - the result of years of exposure to the atmosphere. Paste, Polishing Number 5 got rid of that nicely; the right-hand side of this glass has been polished and the left hasn't. |
 |
|
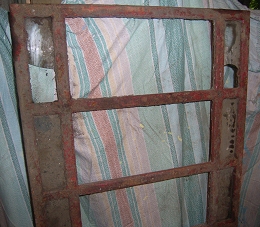 |
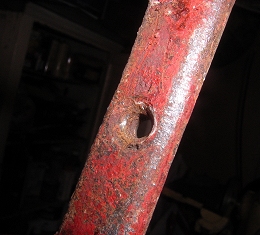
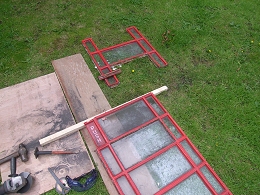
I was fortunate to obtain 3 original cast iron door panels, two of which were intact and with most of their cast iron bead frames in place. The third panel was damaged but still had some cast iron frames and also a glass "Push / Pull" notice (most of these you find are the later plastic ones). I decided to destroy the damaged panel in the hope of extracting all the glazing frames intact and also recovering the glass "Push / Pull" notice. This is one of the door panels pretty much as recieved. |
|
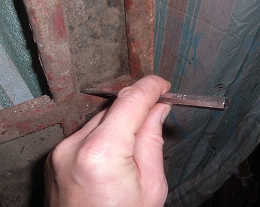
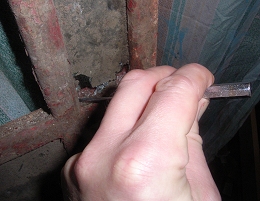
The next few photos tell the story of how to recover the cast iron bead frames without breaking them - they are fragile! First of all you must punch out the pins (or unscrew the screws) which hold the frame in place (see below). Assuming you've got the pins or screws out, use a punch to knock out the two bottom corners of the glass. Please do wear goggles to protect your eyes! |
 |
|
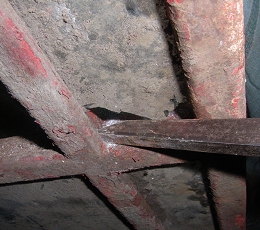
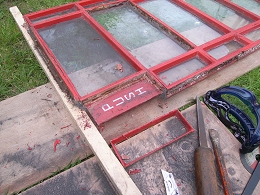
You can now see the frame corners through the panel. Use the punch and a hammer to tap out the bottom of the frame. Make sure you hit the corners - the strongest part and alternate from one corner to the other. Incidentally, these panels had apparently been used as a fence in an allotment, hence all the, er, dirt! |
 |
|
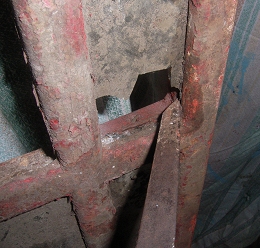
Alternatively you can use an old chisel to do the same job. Make sure you keep as close to the corners as possible. I'm afraid I can't claim this technique as my own - it was shown to me by Carl Burge of Remember When. - I can't recommend this firm highly enough, they have helped me out with lots of obscure parts, as well as advice and encouragement during my restoration - thanks Carl! |
 |
|
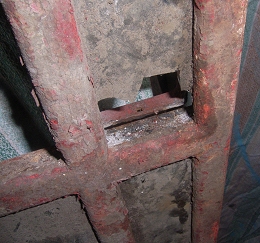
Here the bead frame is just starting to move. Keep swapping sides and take it slowly. |
 |
|
Once the bead frame has moved this far use your hands to gently waggle the frame out - mind that glass! |
 |
|
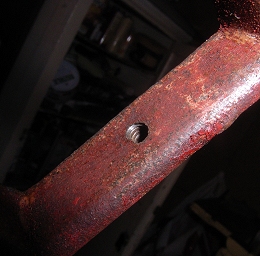
Two of the three door panels had the bead frames attached not with pins but with 3/16" W brass countersunk machine screws. This means they are from pre 1939 Mk. 1 K6s. EI A5003 paragraph 10a says; "In a Mk. 1 kiosk the bead frames are secured by brass screws and those in a Mk. 2 by brass dowels". This is a close-up of one end of a frame showing how it is countersunk to accept the screw head. |
 |
|
The other end of the frame is threaded 3/16" W. |
 |
|
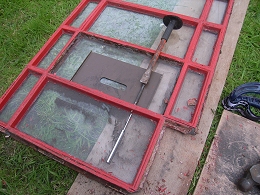
Why am I messing around with these old bead frames anyway? Well if you look at this picture you can see a modern steel frame in the upper apperture and a cast iron frame in the lower. The rounded edge of the cast frame just looks much neater. |
 |
|
Here is the damaged door panel. Ironically (apart from the obvious damage) this panel was in much better condition than the other two. Also this panel had the bead frames held in with pins rather than screws meaning it is from a Mk. 2 K6. |
 |
|
I used an angle grinder to chop part way through the panel and then a large hammer and chisel to break bits off. Goggles are a must of course. |
 |
|
The frames fell out easily without all the hassle of the above method! |
 |
|
So did most of the glass, including the "Push / Pull" notice :-) |
 |
|
This shows my method for punching out the brass pins which hold the frames in place. The smaller diameter (chrome) punch is used to punch out the first, larger diameter, punch which tends to get stuck after pushing out the pin. The steel sheet protects the glass and the chisel gets you a better angle for your hammer. |
 |
|
 |
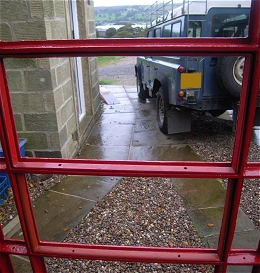
17th October 2008. Inserted the 4 "Telephone" glasses in the transom and also 9 glass panes on the right-hand side - very satisfying indeed :-) |
|
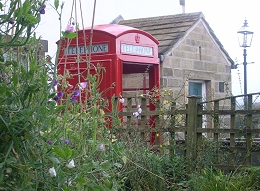
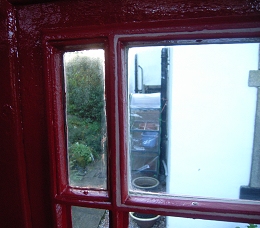
The view through the undergrowth... |
 |
|
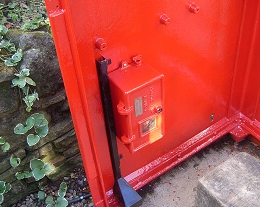 |
Just testing to make sure the Venner timeswitch and the "hockey stick" conduit fit OK. |
|
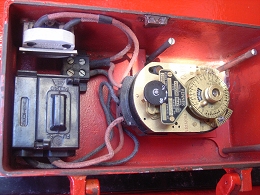
Inside the Venner, showing the timeswitch, fuse holder and manual override switch at top left). The solar dial fitted to the timeswitch meant the light in the kiosk was switched on 30 minutes before sunset and was switched off 30 minutes after sunrise. The mechanism changed this time according to the day and month. I've aquired a commercial version which allows the light to be switched off at a fixed time (e.g. on 30 minutes before sunset and off at 11:00p.m.) |
 |
|
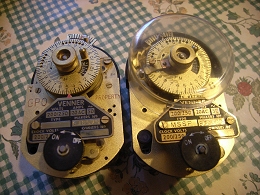 |
This shows a GPO venner timeswitch with solar dial on the left alongside the commercial equivalent. The commercial version has an extra switching lever to allow for a fixed off time. This will reduce the electricity bill by having the light switch off after 11:00p.m. |
|
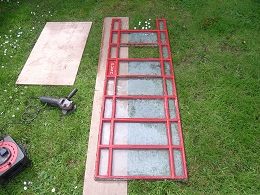
30th October 2008. West side of the kiosk is now fully glazed. It is taking me about an hour to fit a row of three bead frames - that works out at about eight hours (and two kilos of putty) per side! Mind you I am rather particular... No doubt it would be much quicker if I used silicone, but that's not the G.P.O. way ;-) Door panel restoration also well underway. I've managed to keep eleven panes in the door panel intact (3 were broken). Ten panes have been removed to allow it to be screwed to the hardwood surround.
|
 |
|
 |
Inside view showing the one original pane of glass (and bead frame) on the left and a newly installed large frame on the right. Once the putty has "gone off" I'll go over it with red paint so it all blends in. |
|
18th July 2009. Photo shows new hardwood door frame temporarily positioned in kiosk opening prior to painting, but after a coat of primer / preservative. Remember When were able to supply me with this along with an original Siemens fuse box which even came complete with the GPO hardwood backboard - thanks once again Carl! Cast iron door panel restoration now complete. All missing panes fitted, apart from the ones which can only be installed after the door panel is attached to its frame.
|
 |
|
|
|
||
| Press button |

|
for homepage |